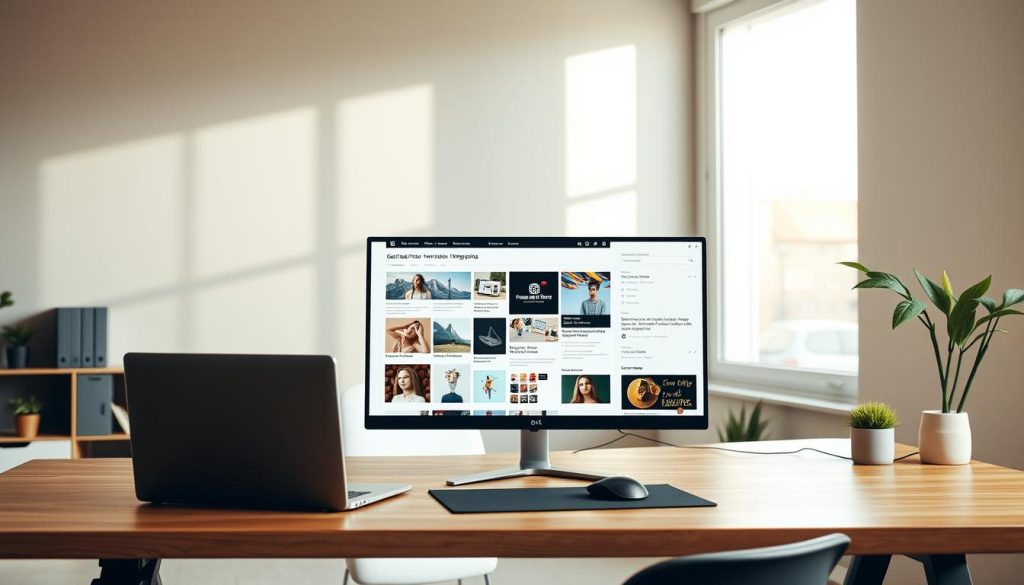
Choose a free platform, pick a niche, publish consistently, optimize for SEO, promote.
If you want to learn how to start a blog for free, you are in the right place. I’ve set up blogs on almost every free platform and helped others do the same. This guide gives you a clear roadmap, proven tips, and mistakes to avoid, so you can hit publish with confidence and grow fast without spending a dollar.
Define your purpose and niche
Clarity beats speed. Before you click sign up, write down your goal. Do you want to build a brand, share hobbies, or test ideas? Your why will guide every choice.
Pick a narrow niche so readers know what to expect. A tight focus also helps search engines understand your site. If you ask how to start a blog for free, begin by choosing a topic you can write about for a year.
Use a simple niche filter:
Topic you enjoy each week. You will stick with it.
Real problems you can solve. People search for answers.
A few easy keywords. Check search bars for suggestions.
Choose the right free blogging platform
The best platform depends on your goals and skills. When people ask how to start a blog for free, I suggest starting where setup is easy and limits are clear.
Blogger: Google’s simple tool, easy setup, solid for beginners, fewer modern themes.
Wix free plan: Drag and drop design, Wix branding, subdomain, basic SEO.
Medium: Great reach, clean writing, less control over design and SEO.
Substack: Email-first blogging, free to start, great for newsletters, simple pages.
Tumblr: Fast microblogging, social features, basic SEO.
GitHub Pages: Free static hosting, needs tech skills, very fast.
Pick based on these factors:
Ease of use: Want drag and drop or a classic editor?
SEO control: Custom URLs, meta tags, and clean code help.
Ownership and export: Can you move your content later?
Ads and branding: Free plans often show their branding.
Storage and bandwidth: Free plans have caps.
My take: For most beginners, WordPress.com or Blogger offers a simple start, strong SEO basics, and easy export if you upgrade later.
Set up your free blog step by step
Here is a short setup flow you can follow today. This works on WordPress.com, Blogger, or Wix with tiny changes.
Create your account and claim a clear subdomain. Use keywords if you can.
Pick a clean theme. Choose fast over flashy. You can change later.
Set site title, tagline, and logo. Keep words short and clear.
Create key pages: About, Contact, and a simple Home.
Set your permalink style to a short format with post name.
Connect analytics. Use a free analytics tool for traffic trends.
Write and publish your first post. Keep it helpful and simple.
Add basic navigation. Help readers find key posts fast.
If you wonder how to start a blog for free and avoid tech pain, keep your stack light. Start with defaults. You can tweak once you have five posts live.
Design and branding on a zero budget
Good design is clear, not loud. A free theme with simple fonts can look great. Keep your brand clean so readers focus on your words.
Use these quick wins:
Choose one accent color and one neutral color.
Use one or two fonts. Pick legible, web-safe fonts.
Keep spacing wide. White space makes reading easy.
Set a simple logo or text logo. No need for a designer.
I once spent days on a fancy theme and lost momentum. When learning how to start a blog for free, ship a clean look in one hour, then start writing.
Create posts readers and search engines love
Great content drives growth. SEO helps people find it. The sweet spot is helpful posts written in plain words.
Use a repeatable post outline:
Hook: State the problem in one line.
Promise: Say what your post will deliver.
Steps or tips: Use short sections and bullets.
Proof: Add examples, screenshots, or brief data points.
Action: Tell the reader what to do next.
SEO basics you can apply on any free platform:
Research simple keywords. Target long phrases with clear intent.
Put the main phrase in the title, first paragraph, and URL.
Use short headings and short sentences. Aim for clear reading.
Add internal links to related posts. Use clear anchor text.
Write meta descriptions that invite clicks.
If you ask how to start a blog for free and still rank, focus on helpful posts, not tricks. Recent studies show that content depth and clarity beat keyword stuffing.
Free tools and workflows that save time
You do not need paid tools to work smart. Use a simple stack and build a habit.
Helpful free tools:
Keyword ideas: Use search engine autosuggest and related searches.
Images: Use public domain or your own screenshots. Compress images before upload.
Writing: Draft in a distraction-free editor. Use a grammar checker.
Planning: Keep a simple content calendar in a spreadsheet.
Analytics: Track page views, time on page, and top posts.
A simple weekly workflow:
Research two low-competition topics.
Draft one post, 800–1,200 words, in plain language.
Edit for clarity and add two internal links.
Create one image or chart.
Publish and share in two relevant communities.
This is the routine I teach when people ask how to start a blog for free and stay consistent.
Promote and grow without spending money
No budget does not mean no reach. Share where your readers hang out. Be helpful, not spammy.
Proven free tactics:
Answer questions in forums and link to a relevant post.
Share short tips on social platforms and link to your article.
Join niche groups. Post value first, then a link.
Build an email list from day one with a free tool.
Repurpose posts into short videos or threads.
When learning how to start a blog for free, think of promotion as a daily habit. Ten minutes a day beats a big push once a month.
Make money from a free blog, the right way
Free plans have ad and affiliate limits. Read the platform terms first. Still, you can start simple and build.
Starter monetization ideas:
Affiliate links to tools you use. Disclose every time.
Lead magnets. Offer a free checklist to grow an email list.
Services. Offer coaching, templates, or freelance work.
Donations. Use a tip jar if your content helps people.
Manage expectations. On free plans, income is slow at first. If you keep asking how to start a blog for free and earn, focus on value, trust, and email growth.
Legal, privacy, and trust basics
Trust builds loyal readers and search engine confidence. Make basics clear even on day one.
Do the following:
Add a simple privacy notice. Explain any analytics or cookies.
Disclose affiliate links and sponsorships. Place notes near the links.
Use only images you own or have the right to use.
Share your real name or a clear author bio.
These steps show readers you care. If you want to know how to start a blog for free and stay safe, make honesty your default setting.
Maintain, measure, and know when to upgrade
Growth needs care. Track what works and adjust. Upgrading later is not failure; it is a sign of progress.
Simple maintenance plan:
Weekly: Fix broken links and update one older post.
Monthly: Review top pages and improve internal links.
Quarterly: Refresh your About page and best posts.
Upgrade when:
You want a custom domain for brand trust.
You need speed, plugins, or better SEO control.
You plan serious monetization with fewer limits.
When people ask how to start a blog for free and then scale, I suggest moving to a custom domain once you hit steady traffic or 20–30 solid posts.
Frequently Asked Questions
Is it realistic to get traffic on a free blog?
Yes. Helpful content and smart promotion work on any platform. Clean topics, clear titles, and internal links help you grow.
Which free platform is best for beginners?
WordPress.com and Blogger are easy and stable. They offer simple setup, basic SEO tools, and a smooth upgrade path.
Can I use a custom domain on a free plan?
Some platforms let you connect a domain only on paid plans. If custom branding is key, plan to upgrade when ready.
How often should I publish?
Aim for one post per week to start. Consistency helps both readers and search engines trust your site.
How do I do SEO with no budget?
Use long-tail keywords, clear titles, and helpful headings. Link related posts, write simple sentences, and answer real questions in depth.
Can I move my free blog later?
Yes, most platforms let you export content. Test the export steps early to avoid surprises.
What are the limits of free plans?
You may face storage caps, platform branding, and limited monetization. Read the terms so you know your boundaries.
Conclusion
You now have a clear path to launch, write, and grow without spending money. Start small, publish weekly, and improve your posts with feedback and data. If you keep asking how to start a blog for free, the answer is to begin today and learn in public.
Pick your platform, claim your name, and publish your first post this week. Subscribe for more step-by-step guides, or leave a comment with your niche and I will suggest your first three post ideas.
You are here to learn how to create a wordpress website from scratch for beginners, and you want it done right. I have built dozens of sites for clients and for myself. In this guide, I will show how to create a wordpress website from scratch for beginners with clear steps, real examples, and pro tips that save time and money. Follow along, and you will launch a fast, secure site that you control.
Source: themeisle
Understanding WordPress and Key Terms
WordPress is a content management system. It lets you create pages and posts without writing code. You can edit your site in a simple dashboard. You can add features with themes and plugins.
There are two versions. WordPress.org is self-hosted and gives full control. WordPress.com is hosted and has limits unless you upgrade. In this guide, we use WordPress.org because it fits most needs.
You will see these terms often. A theme controls the look. A plugin adds features. A page is static content. A post is part of your blog. Knowing these basics makes how to create a wordpress website from scratch for beginners much easier.
Source: cmsminds
Plan Your Site Structure and Content
Start with a simple plan. Define your goal. Do you want leads, sales, or a blog? Pick one main goal to guide all choices.
Map key pages. Most sites need Home, About, Services or Shop, Blog, and Contact. Keep menus short and clear. Add only what helps your goal.
Write short drafts now. Clear copy speeds up every step. It also helps you choose the right theme. When I skip this, design takes longer and costs more. Planning is the first win in how to create a wordpress website from scratch for beginners.
Source: themeisle
Choose a Domain and Hosting
Pick a domain that is short and easy to say. Use words users know. Avoid numbers and tricks. If your brand is taken, add a simple word like “hq” or “studio.”
Choose hosting that is fast and stable. Look for free SSL, daily backups, and support. A small site can start on shared hosting. A growing site may need managed WordPress hosting. Speed and uptime matter for search and users.
Buy the domain and hosting from trusted providers. Use the same account for both to keep it simple. This step is key in how to create a wordpress website from scratch for beginners because it sets your base.
Source: seedprod
Install WordPress Step by Step
Most hosts offer a one-click WordPress install. It takes a few minutes. You can also install it with a manual setup. Here is the simple flow.
Log in to your host and open the control panel.
Find the WordPress installer and click install.
Choose your domain, set your admin email, and set a strong password.
Finish the install and note your login URL. It is often yoursite.com/wp-admin.
After install, log in to the dashboard. You now have a live site. This is the heart of how to create a wordpress website from scratch for beginners.
Source: duplicator
Configure Core Settings
Tidy the basics before design. It prevents headaches later. These quick settings help with search and user trust.
Go to Settings and update Site Title and Tagline. Keep them short and clear.
Set your timezone, date, and time formats.
Set permalinks to Post name for clean URLs.
In Reading, choose a static Home page if you plan a custom home.
Delete demo posts and plugins you do not need.
Use a strong admin password. Do not use “admin” as the username. This is a simple but vital step in how to create a wordpress website from scratch for beginners.
Source: youtube
Choose and Customize a Theme
Pick a theme that is fast, clean, and well supported. Choose a theme with high ratings and frequent updates. Test the demo on mobile. Performance counts as much as looks.
Install the theme and a child theme if you plan custom code. Use the Customizer or the site editor to set colors, fonts, and layout. Keep design light. White space and clear text beat clutter.
I learned to avoid heavy themes with too many features. They slow sites and add bugs. A lean theme fits how to create a wordpress website from scratch for beginners and keeps editing simple.
Source: cyberchimps
Install Essential Plugins
Plugins add key tools. Start with a small set. Add more only when needed. Keep them updated to stay secure.
SEO plugin for titles, meta, and sitemaps.
Caching plugin to speed up pages.
Security plugin for firewall and login protection.
Backup plugin with off-site storage.
Forms plugin for contact and leads.
Image optimization plugin to shrink images.
Install, activate, and configure each plugin. Test your site after each one. This keeps how to create a wordpress website from scratch for beginners stable and smooth.
Source: youtube
Build Pages, Posts, and Menus
Create the core pages first. Use clear headings and short paragraphs. Add real images with alt text. Make sure each page has one main goal.
Home: say who you help and how. Add one clear call to action.
About: explain your story and your values. Add a photo to build trust.
Services or Shop: show what you offer. Use simple prices and bundles.
Blog: write posts that answer real questions.
Contact: add a form, email, phone, and map if needed.
Create menus under Appearance. Keep the top menu simple. Add footer links for legal pages. This structure is the backbone of how to create a wordpress website from scratch for beginners.
Source: cmsminds
Set Up SEO the Right Way
SEO starts with clean basics. Add a site title that fits your brand. Write unique meta descriptions. Use one H1 per page. Use H2 and H3 to guide readers.
Do keyword research. Pick one main term per page. Use related terms in your copy. Do not stuff keywords. Clear writing wins. Create an XML sitemap and submit it in your search console account.
Make helpful content. Answer user questions with simple words. Add internal links between related pages and posts. When you plan how to create a wordpress website from scratch for beginners, SEO is the slow and steady lever that compounds.
Speed, Security, and Backups
Fast sites rank and convert better. Aim for fast first load. Use a cache. Compress images. Use modern image formats where possible. Reduce plugins that load on every page.
Security matters from day one. Turn on SSL so your URL shows https. Use two-factor login. Limit login attempts. Keep WordPress, themes, and plugins updated. Delete anything you do not use.
Backups are your safety net. Schedule daily backups. Store them off site. Test a restore once, so you know it works. This step is non-negotiable in how to create a wordpress website from scratch for beginners.
Launch Checklist and Next Steps
Do a final sweep before you launch. Check each page on mobile and desktop. Fix any typos and broken links. Test forms and email alerts.
Set a custom 404 page that helps users find content.
Add basic legal pages. Include privacy policy and terms.
Set up analytics to track traffic and goals.
Connect your site to search console and submit your sitemap.
Share your site on social and ask a few friends to test.
After launch, keep a simple routine. Update software weekly. Review analytics monthly. Improve one page at a time. This steady pace is a healthy way to manage how to create a wordpress website from scratch for beginners.
Frequently Asked Questions of how to create a wordpress website from scratch for beginners
How long does it take to build a basic WordPress site?
Most beginners can build a simple site in one weekend. Planning and content can take longer than setup.
How much does it cost to start?
You can start for the cost of a domain and hosting. Many themes and plugins are free, and you can upgrade later.
Do I need to know how to code?
No, you can build everything with the visual editor and plugins. Code helps for advanced features, but it is not required.
Which is better for beginners: WordPress.org or WordPress.com?
WordPress.org gives more control and flexibility. It is the better choice if you want to grow your site and own your data.
What pages should a new site have?
Start with Home, About, Services or Shop, Blog, and Contact. Add legal pages like privacy policy and terms for trust.
Conclusion
You now know how to plan, build, and launch a complete site. You picked hosting, installed WordPress, set a theme, added pages, and locked in speed, SEO, and security. With this guide to how to create a wordpress website from scratch for beginners, you have a clear path from idea to launch.
Take the next step today. Build your first page, then your menu, then your blog. Publish, learn, and improve. If this helped, subscribe for more guides, share it with a friend, or leave a comment with your next goal.
Understanding the difference between WordPress.com and WordPress.org is crucial before creating your WordPress website. Many beginners get confused between these two platforms, which can lead to wasted time, unnecessary expenses, and limited website functionality.
What is WordPress.org?
WordPress.org is the official website where you can download the free, open-source WordPress software. This software allows you to create a fully customizable WordPress website by installing it on your own web hosting server. The software itself is free, and you have complete control over your website’s features, design, and plugins.
On WordPress.org, you can :
Download the WordPress software for free
Install it on any web server or hosting provider you choose
Access and use thousands of free and premium themes and plugins
Have full control over your website and data
When people say they use WordPress to build their websites, they usually mean that they have downloaded this open-source software from WordPress.org and installed it on their own hosting.
What is WordPress.com?
WordPress.com is a for-profit company that offers hosted WordPress websites with different plans and pricing tiers. It provides website building and hosting services bundled together, but with many limitations unless you upgrade to higher-tier paid plans.
Key points about WordPress.com include :
Offers a free plan with very limited features
Paid plans start at $4 per month (billed annually) and can go up to $45 per month
Access to plugins and themes is restricted unless you upgrade to the Business plan ($40/month or more)
Limited ability to install custom themes and plugins on lower-tier plans
Hosting is included, but it is often more expensive than buying hosting separately
Many beginners mistakenly sign up on WordPress.com expecting full WordPress functionality but find out they need to pay high fees to unlock essential features. The personal and premium plans do not offer the full WordPress experience, forcing users to upgrade to expensive plans for business use.
Why WordPress.org is Recommended Over WordPress.com
Because WordPress.org offers the full open-source WordPress software for free, and you only pay for hosting and domain registration, it is more affordable and flexible. You can install any theme or plugin you want, customize your site extensively, and avoid costly monthly fees imposed by WordPress.com for advanced features.
Summary of why WordPress.org is better for most users :
Complete control over your website and data
Access to thousands of free themes and plugins without restrictions
More affordable hosting options available
Ability to monetize and customize your website freely
No forced upgrades to expensive plans
WordPress.com is ideal for absolute beginners who want a simple blog with no maintenance, but for anyone serious about building a professional website, WordPress.org with your own hosting is the best choice.
—
The Correct Process
Building a professional WordPress website requires following a structured, step-by-step process. This ensures that your website is set up correctly from the start, is secure, and performs well. Below is an overview of the correct process to create your WordPress website from scratch.
Step 1 : Set Up Hosting
Your website needs to be hosted on a server that is always connected to the internet. Hosting is essentially renting space on a server where your website files are stored and served to visitors 24/7. Choosing reliable and affordable hosting is the first step.
Step 2 : Register Your Domain
A domain is your website’s address on the internet (e.g., yourwebsite.com). You will register a domain name that represents your brand, business, or personal site. A good domain name is short, simple, and easy to remember.
Step 3 : Install WordPress Software
After setting up hosting and domain, you install the WordPress software on your hosting server. This is usually a one-click process with most hosting providers, making it quick and easy for beginners.
Step 4 : Install a Theme and Plugins
Once WordPress is installed, you add a theme to control the design and layout of your site. You also install plugins to add extra functionality like contact forms, SEO tools, or page builders. Free themes and plugins like Astra and Elementor are excellent starting points.
Step 5 : Customize Your Website
Using a visual page builder like Elementor, you can customize your website without writing any code. This drag-and-drop editor allows you to modify pages, add content, images, and adjust layouts easily.
Summary Table of the Correct Process
Step
Action
Purpose
1
Get Hosting
Rent server space for website files
2
Register Domain
Choose and secure your website’s address
3
Install WordPress
Set up WordPress software on the server
4
Install Theme & Plugins
Design website and add features
5
Customize Website
Build and personalize site content visually
Following this correct process ensures your WordPress website is professional, scalable, and easy to manage.
—
Getting Best WordPress Hosting
Choosing the right hosting provider is critical for the success of your WordPress website. Good hosting ensures your site loads quickly, remains secure, and is reliable with minimal downtime. Here’s a detailed guide on getting the best WordPress hosting.
Recommended Hosting Providers
The official WordPress.org website lists recommended hosting providers such as Bluehost, Hostinger, DreamHost, and WordPress.com itself. However, for beginners and budget-conscious users, Hostinger stands out due to affordability, ease of use, and performance.
Why Choose Hostinger?
Affordable Pricing : Plans start as low as around $3 per month with discounts available.
User-Friendly Dashboard : Hostinger’s dashboard is intuitive, making setup simple.
Good Performance : Fast servers and optimized for WordPress speed.
Customer Support : 24/7 support to help you with any issues.
30-Day Money-Back Guarantee : Risk-free trial period to test their services.
Choosing the Right Hosting Plan
Hostinger offers several plans, but the two most suitable for WordPress websites are :
Plan
Features
Ideal For
Premium Plan
Good performance, suitable for most websites, includes basic speed optimization
Beginners and small to medium websites
Business Plan
Higher traffic capacity, more storage, includes CDN for faster loading globally
Growing businesses or websites expecting higher traffic
If budget allows, the Business Plan is recommended for its enhanced speed and scalability. Otherwise, the Premium Plan is sufficient for most new websites.
Payment Options and Discounts
You can choose how many months or years to pay upfront. Paying for a longer period (e.g., 48 months) reduces the monthly cost significantly. For example :
48 months : Approximately $3.99/month for the first four years, then renews at around $8.99/month
12 months : Around $3.99/month, renews at higher rates after the first year
Additionally, using discount codes (like madxmedia) can give you an extra 10% off your hosting plan.
How to Sign Up for Hostinger Hosting
Go to the Hostinger website via a trusted affiliate link (e.g., in the tutorial’s video description).
Choose your preferred hosting plan (Premium or Business).
Select your payment period for best pricing.
Enter your email and create an account or sign up with Google.
Apply any coupon codes for additional discounts.
Complete the payment and proceed to the Hostinger dashboard.
Verify your email address through the confirmation email.
Once set up, you’re ready to move on to registering your domain and installing WordPress.
—
Registering Your Domain
Your domain name is your website’s online address, such as yourwebsite.com. It is essential to choose a domain that is memorable, professional, and fits your brand or personal identity. Here’s a detailed guide to registering your domain.
Choosing the Right Domain Name
When selecting a domain name, consider these points :
Keep it short and simple : Easy to remember and type
Use a .com extension : It is the most common and trusted domain extension
Avoid numbers and hyphens : These can confuse visitors and look less professional
Reflect your brand or purpose : Use your business name, your personal name, or relevant keywords
For example, for a personal portfolio site, johnsmith.com or for a company, medxmedia.com would be appropriate.
How to Register Your Domain with Hostinger
Log into your Hostinger dashboard.
Navigate to the “Home” section and click on “Claim Domain”.
Change the domain extension to “.com” for best recognition.
Enter your desired domain name in the search field.
Click on “Check Availability” to see if the domain is available.
If available, click “Claim Domain” to proceed with registration.
Fill in your contact details for domain registration — choose “Personal” if it’s a personal site or “Company” if it’s for business.
Complete the registration process by clicking “Finish”.
Verify your email address by clicking the link sent in the domain verification email.
Important Notes About Domain Registration
Domain registration usually comes with an annual fee; some hosting plans may include a free domain for the first year.
Keep your contact details accurate to avoid losing control of your domain.
Verify your email promptly to activate your domain fully.
Once registered and verified, your domain will be active and ready to connect to your hosting.
—
Installing WordPress
Installing WordPress is the next crucial step after securing your hosting and domain. Most modern hosting providers, like Hostinger, offer one-click WordPress installation to simplify the process for beginners.
Step-by-Step WordPress Installation on Hostinger
Log into your Hostinger dashboard.
Go to the “Hosting” section and select your hosting plan.
Click on “Setup” or “Setup Hosting Plan”.
You may be prompted to answer some setup questions; you can skip these to save time.
Choose to create a new website and select WordPress as your platform (not the website builder).
Enter your WordPress admin email (preferably the same as your hosting email) and create a secure password.
Select your domain name from the list of domains you own.
Choose the server location closest to your target audience for better performance (e.g., United States, Europe).
Click “Next” and wait while WordPress is installed automatically.
Once installed, you should be redirected to your WordPress dashboard.
Accessing Your WordPress Dashboard
If you are not automatically redirected, you can manually access the WordPress admin panel by typing the following URL in your browser :
yourdomain.com/wp-admin
Replace yourdomain.com with your actual domain. You will see the login screen where you enter your WordPress admin email and password created during installation.
Post-Installation Steps
After installation, your WordPress dashboard is your website’s control panel where you can :
Install and activate themes
Add plugins for extra functionality
Create and edit pages and posts
Manage users, settings, and more
From here, you can start building and customizing your website with themes like Astra and page builders like Elementor for a code-free design experience.
Choosing Your Theme
Choosing the right theme is a crucial step when building your WordPress website. A theme determines the overall design, layout, and appearance of your site. It provides the basic structure and style, allowing you to customize and build your site without writing any code. In this tutorial, we recommend using the Astra theme, which is one of the most popular free themes available for WordPress.
Why Choose Astra Theme?
Astra is favored for its lightweight design, flexibility, and compatibility with popular page builders like Elementor. It offers a clean, professional look and provides numerous customization options without overwhelming beginners.
To install Astra :
Navigate to your WordPress dashboard.
Go to Appearance > Themes on the left sidebar.
Click on Add New at the top.
Search for Astra using the search bar.
Click Install and then Activate.
Once activated, Astra becomes the active theme for your website, giving you a solid foundation to begin customizing your site using drag-and-drop page builders.
Benefits of Using a Theme
Basic Structure : Themes provide the essential layout and design elements, such as headers, footers, and page templates.
Customization Options : Most themes, including Astra, offer settings to modify colors, fonts, and layouts without coding.
Compatibility : Astra works seamlessly with Elementor, enabling drag-and-drop editing and easy site building.
Responsive Design : Astra is mobile-friendly, ensuring your site looks great on all devices.
Choosing a theme like Astra simplifies the website creation process, especially for beginners, by providing a user-friendly environment and robust functionality.
Installing Plugins
Plugins are essential tools that extend the functionality of your WordPress website. They can add new features, improve performance, and help with customization. After installing your theme, the next step is to install the necessary plugins to support your site building process.
Installing the Starter Templates Plugin
One crucial plugin recommended in this tutorial is the Starter Templates plugin. This plugin gives you access to hundreds of professionally designed website templates, making it easier to build your site quickly and efficiently.
From your WordPress dashboard, navigate to Plugins > Add New.
Search for Starter Templates in the search bar.
Click Install Now on the plugin and then click Activate.
Once activated, the Starter Templates plugin integrates with your page builder and offers a wide variety of templates tailored for different types of websites, such as portfolios, restaurants, blogs, and more.
Managing Pre-installed Plugins
If you have used hosting providers like Hostinger, you might find some pre-installed plugins that you won’t need. For example, Hostinger often includes plugins such as Hosting AI or Hosting Tools. In this tutorial, these plugins are unnecessary and can be safely deactivated and deleted to keep your website lean and avoid conflicts.
To deactivate and delete unwanted plugins :
Go to Plugins > Installed Plugins.
Select the plugins you want to remove by ticking their checkboxes.
From the Bulk Actions dropdown, select Deactivate and click Apply.
After deactivation, select the same plugins again, choose Delete from the bulk actions dropdown, and click Apply.
Caching Plugin
Another important plugin you might find is the LiteSpeed Cache plugin, which helps improve your website’s loading speed by caching content. However, during the website building phase, it is recommended to temporarily deactivate this plugin to avoid any caching issues while making changes. You can reactivate it once your website is complete.
Summary of Plugin Installation
Install the Starter Templates plugin for easy access to professionally designed website templates.
Deactivate and delete any unnecessary pre-installed plugins to keep your site clean.
Temporarily disable caching plugins during development for smooth editing.
Later, activate caching plugins to enhance website performance.
Choosing Best Page Builder
A page builder allows you to create and customize your website visually using drag-and-drop tools without writing code. In this tutorial, Elementor is chosen as the page builder due to its popularity, ease of use, and powerful features.
Why Elementor?
User-Friendly Interface : Elementor offers an intuitive drag-and-drop editor, making it easy for beginners to design pages.
Flexibility : It provides a wide range of widgets and design options to customize layouts, colors, fonts, and more.
Template Library : Elementor integrates with the Starter Templates plugin, giving access to hundreds of ready-made templates and blocks.
Responsive Design : Ensures your website looks great on desktops, tablets, and mobile devices.
Free and Pro Versions : The free version is sufficient for most beginner needs, with an option to upgrade for advanced features.
How to Select Elementor as Your Page Builder
After installing the Starter Templates plugin, launch it by clicking Get Started.
At the top of the plugin interface, you will see an option to choose your page builder.
Select Elementor from the dropdown menu.
This selection will filter the available templates to those designed specifically for Elementor.
By choosing Elementor, you unlock the power to build highly customized pages with ease, enabling you to visually structure your content and instantly see the results.
Alternative Options
While Elementor is the recommended choice, there are other page builders available such as Beaver Builder, Divi, or the default Gutenberg editor. However, for beginners and those seeking a balance of simplicity and functionality, Elementor is typically the best choice.
Choosing Template
Starting with a pre-designed template significantly accelerates the website building process and ensures a professional look. The Starter Templates plugin provides access to hundreds of templates optimized for Elementor, covering a wide range of industries and purposes.
How to Choose a Template
Open the Starter Templates plugin from your WordPress dashboard.
Ensure Elementor is selected as your page builder.
Browse templates by categories such as portfolio, restaurant, business, blog, and more.
You can also use the search bar to find templates for specific website types (e.g., “portfolio”).
Templates are marked as free or premium; focus on free templates if you want to avoid additional costs.
Click on a template you like to preview it and customize some basic settings like logo, fonts, and colors.
Choose your preferred color scheme and continue to import the template.
Why Use Templates?
Saves Time : No need to design every element from scratch.
Professional Design : Templates are crafted by expert designers, ensuring a polished look.
Customization Ready : Templates are fully customizable, allowing you to tailor them to your brand.
Mobile Friendly : Templates are responsive and optimized for all devices.
For instance, if you’re building a portfolio website, you can search for “portfolio” templates, preview several options, and import the one that best suits your style. After import, you can customize content, images, and layout to make it your own.
Importing Templates
Once you choose a template, the plugin will automatically install all necessary plugins and build the website structure based on the template. This includes importing pages, menus, and demo content, giving you a fully functional website ready for customization.
Customizing Website
After installing your theme, plugins, and choosing a template, the final major step is customizing your website to make it uniquely yours. This involves editing page content, changing images, adjusting colors, and modifying headers and footers to match your brand identity.
Using Elementor to Customize Pages
Elementor is a visual page builder that allows you to customize your website by editing elements directly on the page.
Accessing Elementor Editor : When logged into your WordPress dashboard, visit your website and click the Edit with Elementor link at the top bar to launch the editor.
Page Structure : Elementor organizes pages into containers, columns, and widgets. On the right side, you can see an overview of this structure.
Editing Text : Click on any text element to edit it. You can type directly or double-click to highlight and replace the content.
Changing Buttons : Select a button to change its label, style, and link destination.
Replacing Images : Click on an image element and use the media library to upload or select a new image.
Adding Elements : Use the plus icon at the top left to drag and drop new widgets like headings, text editors, images, and more.
Deleting Elements : Right-click on any element or container and select Delete to remove it.
Saving Changes : Click Publish or Update at the bottom to make your changes live.
Customizing Headers and Footers
Headers and footers are key parts of your website’s design and branding. Using the WordPress customizer, you can easily modify these areas.
Click Customize at the top of your WordPress dashboard or through Appearance > Customize.
Hover over the header or footer area to reveal pen icons for editing.
Click the pen icon to open the editing options where you can change logos, contact information, social icons, and text.
Make your adjustments and save changes.
Adding and Editing Pages
You can add new pages to your website and customize them with Elementor :
In your WordPress dashboard, click Pages > Add New.
Give your page a name (e.g., “Our Team”) and click Publish.
Click Edit with Elementor to open the page builder for your new page.
Add content by dragging widgets or importing pre-made blocks from Elementor’s library.
Customize text, images, and layout as needed.
Save and publish your changes.
Managing Navigation Menus
After creating new pages, you may want to add them to your site’s navigation menu :
Go to Appearance > Customize > Menus.
Select your main menu (usually the one displayed in your header).
Click Add Items and select the pages you want to include.
Arrange menu items by dragging them in the desired order.
Click Publish to save changes.
Tips for Effective Customization
Consistency : Use consistent fonts, colors, and styles throughout your website.
Keep it Simple : Avoid clutter by only adding necessary elements and content.
Mobile Optimization : Preview your site on different devices to ensure responsiveness.
Use Templates and Blocks : Leverage pre-made Elementor blocks and templates to speed up the design process.
Regularly Save : Always save or publish your changes frequently to avoid losing progress.
With Elementor and your chosen theme and template, you have all the tools needed to create a professional, fully customized WordPress website without any coding knowledge.
Understanding Website Structure
Before diving into editing your WordPress website, it’s essential to understand how your website is structured, especially when using the Elementor page builder. Website structure refers to the way your pages, sections, containers, columns, and elements are organized and nested within each other. This hierarchical setup determines how the content appears visually and how easy it is to manage and customize.
How Elementor Organizes Website Content
In Elementor, the structure of your website is broken down into containers and elements. Each page is made up of multiple containers that hold different types of content, such as text, images, buttons, and lists. Understanding this structure helps you navigate and edit your pages efficiently.
Containers and Columns
The highest level of structure on a page is the container. For example, the homepage may have a top container representing the header section. Inside this container, there can be multiple columns, which are smaller containers aligned horizontally. Each column can then contain various elements.
For example, in the video tutorial, the homepage’s first container was divided into three columns :
First column : contained an icon list element
Second column : included a heading, text, and a button
Third column : contained an image element
This same structure applies to other containers on the page and other parts of your website, allowing for precise control over layout and content placement.
Elements Within Containers
Elements are the smallest building blocks inside containers and columns. These include :
Text blocks (headings, paragraphs)
Buttons
Images
Lists (icons, bullet points)
Dividers and other decorative items
Each element can be selected and customized individually. This modular approach means you can edit or remove specific content parts without affecting the entire container or page.
Accessing the Structure View
Elementor provides an overview of your page’s structure on the right side panel. This feature shows a tree-like view of all containers and elements. This visual hierarchy helps you understand how your page is layered and makes it easy to select and edit specific parts.
Benefits of Understanding Website Structure
Efficient Editing : Knowing how containers and elements nest helps you quickly find the part you want to edit.
Better Customization : You can add, move, or delete containers and elements without disrupting your entire layout.
Professional Layouts : Understanding structure ensures your website looks clean, organized, and professional.
In summary, grasping the website structure with Elementor is foundational to creating a flexible and visually appealing WordPress website. It empowers you to customize every aspect of your site with confidence.
Editing Website Elements
Editing website elements in WordPress with Elementor is straightforward and intuitive. Once you understand the website structure, as described above, you can start customizing your site by modifying text, images, buttons, and other components directly on the page.
How to Edit Text Elements
Text editing is one of the most common tasks. To edit a text block (like a heading or paragraph) :
Hover over the text you want to change and click on it.
The editing options will appear on the left sidebar in Elementor.
You can directly change the text in the content box or double-click the text on the page to highlight and rewrite it.
Customize font size, color, alignment, and other typography settings as needed.
This live editing feature allows you to see changes instantly, making it easy to experiment and perfect your content.
Editing Buttons and Adding Links
Buttons are interactive elements that often guide visitors to other pages or external websites. To edit a button :
Click on the button element you want to edit.
In the left sidebar, change the button text to whatever you want visitors to see.
Add or modify the URL link. You can link the button to another page on your website, an external URL, or even an email address.
Adjust button styles such as color, size, border, and hover effects under the style tab.
For example, you might link a button to your portfolio page by typing the page name and selecting it from the suggestions.
Changing Images
To replace or edit an image :
Click on the image you want to change.
On the left sidebar, click the “Choose Image” or “Change Image” button.
Upload a new image or select one from your media library.
Adjust image size, alignment, and other settings as needed.
This process allows you to keep your website fresh with new visual content easily.
Adding New Elements
Elementor provides a wide range of elements you can add to your pages, such as headings, images, videos, spacers, and more. To add a new element :
Click the plus (+) icon at the top left of the Elementor panel.
Drag and drop your desired element onto the page where you want it.
Customize the element’s content and style from the left sidebar.
This drag-and-drop functionality enables quick and flexible page building without any coding knowledge.
Deleting Elements and Containers
If you want to remove an unwanted part of your page :
Right-click on the element or container you want to delete.
Select “Delete” from the context menu.
You can delete single elements or entire containers that might hold multiple elements. This helps keep your design clean and focused.
Publishing Your Changes
After editing, it’s important to save and publish your changes to make them visible to your website visitors. To do this :
Click the Publish button at the bottom or top of the Elementor editor.
You can preview your changes before publishing by clicking the Preview icon (eye icon).
Publishing immediately updates your live website with the new content and design adjustments.
Adding New Page
Adding new pages to your WordPress website is essential for expanding your content and enhancing navigation. Elementor and WordPress make this process simple and beginner-friendly.
Steps to Add a New Page
Open a new browser tab and enter your website URL.
Ensure you are logged into your WordPress dashboard. When logged in, a WordPress admin bar appears at the top of the page.
Click on the New button in the top admin bar, then select Page from the dropdown menu.
Enter a name for your new page (for example, “Our Team”).
Click Publish to make the page live.
Editing the New Page with Elementor
Once the page is published, you can immediately start customizing it with Elementor :
Click the Edit with Elementor button at the top of the page or within the WordPress dashboard under Pages.
The Elementor editor will open, where you can drag and drop elements to build your page.
Using Pre-made Templates for New Pages
To speed up page creation and achieve a professional look, you can use pre-made templates :
In Elementor, click on the Folder icon to open the template library.
Navigate to the Blocks tab to see sections designed for specific page parts.
For example, for an “Our Team” page, type “team” in the search bar to filter relevant templates.
Choose a block or full page template you like and click Insert to add it to your page.
Customize the template by editing text, images, and other elements to fit your content.
Importing Entire Pages from Templates
If you want to import a whole page from the template library :
Click the Folder icon in Elementor.
Go to the Pages section to browse full page templates.
Select a page template and click Import Template.
The entire page will be imported, and you can then modify it as needed.
Publishing and Previewing Your New Page
After editing, click the Publish button in Elementor to make the new page live. Use the preview icon to view your page as visitors will see it.
Adding the New Page to Your Navigation Menu
To make your new page accessible from the website’s navigation menu :
Click on Customize from the WordPress admin bar or dashboard.
Go to Menus and select your main menu (usually labeled “Main Menu”).
Click Add Items and select the new page you created (e.g., “Our Team”).
Add the page to the menu and click Publish to save the changes.
Now, your visitors can easily navigate to your new page from the website menu.
Importing Templates
Importing templates is a powerful way to jumpstart your WordPress website design. Instead of building pages from scratch, you can use professionally designed templates to save time while maintaining a polished look. The Starter Templates plugin combined with Elementor provides access to hundreds of such templates.
Choosing Your Page Builder
When you open the Starter Templates plugin for the first time, you need to select your preferred page builder. Since Elementor is one of the most popular and flexible builders, it is recommended :
Select Elementor as your page builder.
This filters the template library to display only Elementor-compatible templates.
Browsing Template Categories
The template library is organized into categories based on website types or industries, making it easier to find relevant designs :
Examples include restaurant, portfolio, business, blog, and more.
You can also use the search bar to look for specific templates, such as “portfolio.”
Free vs Premium Templates
While many templates in the library are free, some are marked as premium. For beginners or those on a budget, there are plenty of free options that provide a professional appearance and full functionality without any cost.
Importing a Template
Once you find a template you like, click on it.
You can customize some basic settings such as logo upload, font styles, and color schemes before importing.
Click Continue and then choose whether to add additional features or stick with the basic setup.
Click Submit to import the template and install any required plugins.
The template will be added to your WordPress site, ready for customization.
Importing Individual Blocks or Pages
If you don’t want to import a full template, Elementor allows you to import individual blocks or pages from templates :
Open the Elementor editor and click the Folder icon.
Browse blocks or pages in the template library.
Click on a block or page and select Import.
Customize the imported content as needed.
Advantages of Importing Templates
Save Time : Quickly build professional pages without starting from scratch.
Consistent Design : Templates ensure a unified look and feel across your website.
Easy Customization : Modify any element in the imported template to suit your brand.
Importing templates is an essential step for anyone looking to build an attractive website efficiently using WordPress and Elementor.
Editing Navigation Menu
The navigation menu is a crucial part of your website’s usability, allowing visitors to find pages quickly. WordPress makes it easy to edit and customize your site’s menu to include new pages, rearrange items, and create submenus.
Accessing the Menu Customizer
To edit your navigation menu :
Click on Customize in the WordPress admin bar or go to Appearance > Customize in the WordPress dashboard.
Select the Menus section.
Choose the menu you want to edit, usually labeled as Main Menu or Primary Menu.
Adding Pages to the Menu
To add a new page (such as the “Our Team” page) to the navigation menu :
Click on Add Items.
Select the page from the list or search for it by name.
Click on the page to add it to the menu.
Drag and drop menu items to rearrange their order.
Creating Submenus (Dropdowns)
You can create dropdown menus by nesting items :
Drag a menu item slightly to the right underneath another menu item.
This indents the item, making it a submenu of the parent.
Submenus appear as dropdowns on the live website navigation.
Removing or Editing Menu Items
If you want to remove a menu item :
Click on the menu item to expand its settings.
Click Remove to delete it from the menu.
You can also rename menu items or change their links here.
Saving and Publishing Menu Changes
Once you finish editing the menu, click Publish in the customizer to apply the changes to your live site.
Best Practices for Navigation Menus
Keep menu items concise and descriptive.
Limit the number of top-level items to avoid clutter.
Use submenus to organize related pages neatly.
Ensure important pages are easily accessible from the menu.
Editing your navigation menu properly enhances the user experience by making your website easy to navigate and helping visitors find the information they need quickly.
Editing Header & Footer
The header and footer are consistent elements displayed across all pages of your website. They typically contain branding, navigation links, contact information, and other critical details. Editing these areas ensures your website has a cohesive and professional appearance.
Editing the Header
To customize the header :
From your website front-end, ensure you are logged into WordPress to see the admin bar at the top.
Click on Customize in the admin bar.
Hover your mouse over the header area on your website.
Pen icons will appear on editable elements like the logo or menu.
Click on the pen icon next to the logo to change it. You can upload a new logo image here.
Other header elements like menus can be edited by clicking their respective pen icons.
Editing the Footer
To modify the footer :
In the same WordPress customizer, scroll down to the footer area.
Click on the pen icons that appear over footer elements.
This opens the footer builder interface where you can :
Change the footer logo.
Edit contact information such as email addresses.
Modify social media icons or other text displayed in the footer.
Using Elementor for Header and Footer Customization
Some themes and plugins allow you to edit header and footer templates directly in Elementor for more advanced customization :
Edit layout, add custom widgets, and style these areas visually.
Create multiple header/footer versions and assign them to different pages if needed.
Best Practices for Header and Footer Design
Header : Keep it clean and simple with clear branding and easy navigation.
Footer : Include useful links, contact info, and social media icons.
Ensure both are mobile-friendly and consistent across all pages.
Properly editing the header and footer provides a polished, trustworthy appearance and improves site navigation and user engagement across your entire WordPress website.
Starting a blog is exciting, and you can do it in 20 minutes with basic computer skills, says Scott Chow. This guide is for beginners. It will take you through each step.
Blogging is very important. It lets you share ideas, show your expertise, and reach more people. This guide will cover the basics of setting up a blog and the best practices.
Key Takeaways
Understand the basics of blogging and its importance.
Learn the essential steps to set up a blog.
Discover best practices for beginner bloggers.
Get an overview of what to expect from the guide.
Start blogging with confidence.
Understanding Blogs: What They Are and Why You Should Start One
Blogs are a big deal in the digital world. They let people share their thoughts and info. Blogs are websites with written content, called blog posts, shown in reverse order.
What Defines a Blog in Today’s Digital Landscape
Blogs are all about being personal and informal. They share articles, stories, or updates on certain topics. The writing is friendly and easy to connect with.
The Benefits of Blogging for Personal and Professional Growth
Blogging is great for many reasons. It lets you share what you know, meet others who think alike, and show you’re an expert. It also makes you a better writer, boosts creativity, and can open up new job doors.
Benefits
Description
Personal Growth
Improves writing skills, fosters creativity, and enhances self-expression.
Professional Growth
Establishes expertise, opens up new career opportunities, and enhances online presence.
Setting Realistic Expectations for New Bloggers
Starting a blog is a big job. It takes time, hard work, and sticking with it. It’s key to have realistic goals, be patient, and keep up with the digital world.
Knowing what blogs are and their benefits helps you decide to start your own blog.
Planning Your Blog: Essential Pre-Launch Decisions
Before you launch your blog, you need to make some key decisions. These decisions will shape your blog’s identity and direction. A well-planned blog is more likely to attract and keep a loyal audience. Let’s look at the essential pre-launch decisions you must make.
Defining Your Blog’s Purpose and Niche
Defining your blog’s purpose and niche is a foundational step. Your niche determines the topics you’ll cover, while your purpose outlines why you’re blogging. Paige Brunton says choosing a niche and defining your blog’s purpose are crucial initial steps.
To define your niche, think about your passions, expertise, and what topics you’re enthusiastic about. A clear purpose could be to educate, entertain, or inspire your readers.
Key considerations when defining your niche:
Identify your areas of expertise
Research popular and trending topics
Consider your target audience’s interests
Identifying Your Target Audience
Understanding your target audience is vital for creating content that resonates with them. Your target audience is the group of people you’re trying to reach with your blog. To identify them, consider demographics, interests, and pain points.
Knowing your audience helps tailor your content, making it more engaging and relevant.
Steps to identify your target audience:
Conduct market research to understand demographics and interests
Analyze your competitors’ audiences
Create buyer personas to guide your content creation
Creating a Content Strategy Calendar
A content strategy calendar is a plan for the content you’ll publish on your blog. It helps you stay organized and ensures consistency, which is key to keeping your audience engaged. When creating your calendar, consider the types of content you’ll produce, such as tutorials, reviews, or personal stories.
Benefits of a content strategy calendar:
Helps maintain consistency in posting
Ensures a balanced content mix
Reduces last-minute content creation stress
By planning your blog carefully, you set yourself up for success in the blogging world. Effective planning involves defining your niche, understanding your audience, and organizing your content.
Choosing the Right Blogging Platform for Your Needs
There are many blogging platforms out there. Choosing the right one is key. Your platform is the base of your blog, shaping its look and how it works.
Self-Hosted vs. Free Blogging Platforms: Pros and Cons
First, you must decide between self-hosted or free platforms. Self-hosted platforms give you more control but need tech skills.
Free platforms are easy to start but limit design and money-making options. Knowing these differences helps you choose wisely for your blog.
Features
Self-Hosted
Free Platforms
Customization
High
Limited
Monetization
Full Control
Limited
Technical Knowledge
Required
Minimal
WordPress.org vs. WordPress.com, Blogger, and Other Options
Popular choices include WordPress.org, WordPress.com, Blogger, and Squarespace. WordPress.org is self-hosted, offering lots of customization and a big community. WordPress.com is easier but has fewer options than WordPress.org.
Blogger is free and works well with Google services. Scott Chow says using a hosting service like BlueHost makes setting up WordPress easier.
Making the Final Platform Decision Based on Your Goals
Your platform choice depends on your goals. For a professional blog setup, WordPress.org might be best. Beginners might prefer a free platform or WordPress.com.
Think about what you need: customization, making money, and ease of use. This helps you pick the right platform for your blogging journey, whether you’re a beginner or more experienced.
How to Set Up a Blog: The Step-by-Step Process
To start blogging, you need to follow a few key steps. These steps help build your online presence. They are crucial for your blog’s success.
Selecting and Registering Your Domain Name
The first step is to select and register a domain name that shows what your blog is about. It should be easy to remember and spell. Use sites like GoDaddy or Namecheap to see if your name is available and to register it.
Choosing a Reliable Web Hosting Provider
After getting your domain, pick a reliable web hosting provider. Your host will keep your blog’s files safe for visitors. Look at storage, bandwidth, support, and how it grows when choosing a host. Bluehost, SiteGround, and HostGator are good options.
Connecting Your Domain to Your Hosting
Next, connect your domain to your hosting. This means changing your domain’s DNS settings to point to your host. Your host will give you the DNS info and how to do it.
Installing Your Blogging Platform
The last step is to install your blogging platform. Most hosts make it easy with 1-click installs for platforms like WordPress. Or, you can download and install it yourself by following the instructions.
Step
Description
Key Considerations
1. Domain Registration
Register a domain name that reflects your brand or niche.
Memorability, relevance, availability
2. Web Hosting Selection
Choose a web hosting provider that meets your needs.
A well-designed blog makes your site more enjoyable and successful. The design is what visitors first see. It decides if they stay or leave.
Selecting the Perfect Theme for Your Blog
Choosing the right theme is key. It should be clean, responsive, and match your brand. Look for a theme that lets you customize easily.
Find a theme that’s SEO-friendly and well-liked by bloggers. A good theme speeds up your blog and improves its performance.
Customizing Your Blog’s Appearance
Customizing your blog is more than just changing colors and fonts. It’s about creating a brand image that connects with your audience. Paige Brunton says to make your blog more engaging by customizing it.
To customize well, focus on these areas:
Logo and branding
Color scheme and typography
Layout and widget customization
By adjusting these, you can give your blog a unique and professional look.
Customization Element
Description
Impact on Blog
Logo and Branding
Visual identity of your blog
Establishes recognition and trust
Color Scheme and Typography
Visual aesthetics and readability
Enhances user experience and engagement
Layout and Widget Customization
Organization and functionality
Improves navigation and accessibility
Mobile Optimization Essentials
Most people use mobile devices to access the internet. So, making your blog mobile-friendly is essential. Make sure your theme is responsive and test it on different devices for a smooth experience.
Mobile optimization is key to keeping visitors and boosting your blog’s ranking. A mobile-friendly blog works well on all screen sizes, making your content easy to access for everyone.
Essential Pages and Settings for a Professional Blog
Starting a professional blog is more than just posting content. You need to set up key pages and adjust important settings. A well-organized blog makes it easier for users to find and explore your site. It also helps with search engine optimization (SEO).
Creating Your About, Contact, and Privacy Policy Pages
Every professional blog needs About, Contact, and Privacy Policy pages. The About page shares your background, expertise, and blog’s purpose. It helps you connect with readers and show your authority.
The Contact page lets readers reach out to you. It should have a contact form and your email or other contact info. This page is key for communication and potential collaborations.
A Privacy Policy page is both legal and builds trust. It explains how you handle data, including cookies and comments. It’s important for bloggers to detail their data protection practices.
Setting Up Categories and Navigation
Organizing your content with categories and clear navigation is vital. Categories help readers find similar content. A well-organized menu makes it easy for visitors to explore your blog.
Configuring Critical Blog Settings
Setting up your blog’s settings is a key step. This includes setting your blog’s title and tagline, configuring permalinks, and enabling comments. Permalinks should include the post title for better SEO. Also, enabling comments encourages reader engagement, but moderation is needed to keep it positive and spam-free.
By focusing on these essential pages and settings, you lay a strong foundation for your blog. This improves both user experience and your blog’s online visibility.
Creating and Publishing Your First Blog Posts
Your blog is ready for its first posts. This is a key step in setting your blog’s tone and attracting readers. Remember, the quality of your content is very important.
Crafting Engaging Headlines and Content
Start by making engaging headlines that grab attention. Your headline should be interesting and make readers want to click. When writing, focus on giving value to your readers.
Use a friendly tone and make your posts easy to read. Break up your content into smaller paragraphs and use subheadings. Add relevant keywords to help your blog show up in search results.
For beginners, blog building is more than just writing. It’s also about making your blog easy to use.
Adding Images and Media to Your Posts
Adding images and media makes your posts more engaging. Visuals help break up text and make your blog more appealing. Choose images that match your content and are high quality.
Publishing and Scheduling Content
After you’ve written your post, it’s time to publish it. Most platforms let you schedule your posts ahead of time. This helps keep your blog consistent.
Before publishing, check for any mistakes in grammar, spelling, or formatting. Also, optimize your post with meta descriptions and tags for better SEO. By doing these steps, you’ll be on your way to creating a successful blog that keeps readers coming back.
Promoting Your New Blog and Building an Audience
Promoting your blog is key to your blogging journey. It needs a mix of strategies to reach readers. Using different channels helps increase your blog’s visibility and build a loyal audience.
Social Media Strategies for New Bloggers
Social media is essential for promoting your blog. Creating engaging content on Facebook, Twitter, and Instagram can boost your blog’s traffic. Paige Brunton says using social media is vital for blog promotion.
For example, make a Facebook page for your blog and post updates. Twitter is great for sharing your posts and talking with other bloggers. Instagram is perfect for sharing images related to your blog.
Email Marketing and Newsletter Setup
Email marketing is a powerful way to promote your blog and attract readers. Creating a newsletter keeps your audience updated on new posts and news. You’ll need an email service like Mailchimp or ConvertKit to start.
Make your newsletter look good and include a clear call-to-action. This encourages readers to visit your blog. Regular newsletters help build a loyal following and increase blog traffic.
Networking with Other Bloggers in Your Niche
Networking with other bloggers is important for growing your audience. Collaborating with fellow bloggers opens up guest posting, joint social media promotions, and more. This can expand your reach.
Join blogging communities, attend events, and take part in online forums in your niche. Building a network of peers gives you insights and strategies to use for your blog.
Conclusion: Your Blog Launch Checklist
Now that you’ve set up your blog, it’s time to launch. A detailed checklist can help make your launch smooth and successful. Scott Chow suggests checking key elements to make sure your blog is ready for everyone.
To start a blog, confirm your domain, hosting, and platform. Make sure your blog looks good and works well on phones. Also, create important pages like About, Contact, and Privacy Policy.
Before you go live, test your blog’s features. Check how easy it is to navigate and publish content. Also, connect your social media and get ready to promote your blog. This will help you build a strong online presence.
Use this guide to check your work: confirm your domain and hosting, install your platform, design your blog, and create essential pages. After these steps, you’ll be ready to launch and share your content with your audience.
FAQ
What is the best blogging platform for beginners?
WordPress.org and WordPress.com are top picks for bloggers. They offer lots of customization options. But, the best platform for you depends on your needs and goals.
How do I choose a niche for my blog?
Pick a niche that you’re passionate about and good at. Think about who you want to reach. Look into popular topics and trends in your niche to find an audience.
What are the essential pages I need to create for my blog?
You need an About page, Contact page, and Privacy Policy page. They help you look professional and follow the law.
How do I optimize my blog for mobile devices?
Use a responsive theme and optimize your images. Test your blog on different devices for a great user experience.
What is the best way to promote my new blog?
Use social media, email marketing, and network with other bloggers. This helps you reach more people and build a loyal following.
How often should I post new content on my blog?
Post regularly, whether it’s weekly, biweekly, or monthly. This keeps your audience interested and coming back for more.
Can I make money from my blog?
Yes, you can earn money through ads, affiliate marketing, sponsored posts, and selling products. But, you need a big and engaged audience.
How do I register a domain name for my blog?
Register your domain name at GoDaddy or Namecheap. Then, connect it to your web hosting provider.
What is web hosting, and why do I need it?
Web hosting stores your blog’s files so people can see them. You need a reliable host to keep your blog up and running.